笔记
接上期的接口设计
5. 用户可以退出队伍
请求参数:队伍 id
- 校验请求参数
- 校验队伍是否存在
- 校验我是否已加入队伍
- 如果队伍
- 只剩一人,队伍解散
- 还有其他人
- 如果是队长退出队伍,权限转移给第二早加入的用户 —— 先来后到只用取 id 最小的 2 条数据
- 非队长,自己退出队伍
6. 队长可以解散队伍
请求参数:队伍 id 业务流程:
- 校验请求参数
- 校验队伍是否存在
- 校验你是不是队伍的队长
- 移除所有加入队伍的关联信息
- 删除队伍
7. 获取当前用户已加入的队伍
8. 获取当前用户创建的队伍
复用 listTeam 方法,只新增查询条件,不做修改(开闭原则)
事务注解
@Transactional(rollbackFor = Exception.class) 要么数据操作都成功,要么都失败
一、接口设计
1.用户可以退出队伍
(1). 新建退出请求体
@Data
    public class TeamQuitRequest implements Serializable {

        private static final long serialVersionUID = -2038884913144640407L;

        /**
* id
*/
        private Long teamId;

    }
(2).新建quit请求接口
@PostMapping("/quit")
    public BaseResponse<Boolean> quitTeam(@RequestBody TeamQuitRequest teamQuitRequest,HttpServletRequest request){
        if (teamQuitRequest == null){
        throw new BusinessException(ErrorCode.PARAMS_ERROR);
    }
User loginUser = userService.getLoginUser(request);
boolean result = teamService.quitTeam(teamQuitRequest, loginUser);
return ResultUtils.success(result);
}
(3).在TeamService是写入quitTeam方法
/**
* 退出队伍
* @param teamQuitRequest
* @param loginUser
* @return
*/
boolean quitTeam(TeamQuitRequest teamQuitRequest, User loginUser);
(4).在TeamServiceImpl里实现quitTeam方法
@Override
    @Transactional(rollbackFor = Exception.class)
    public boolean quitTeam(TeamQuitRequest teamQuitRequest, User loginUser) {
    if (teamQuitRequest == null) {
        throw new BusinessException(ErrorCode.PARAMS_ERROR);
    }
    Long teamId = teamQuitRequest.getTeamId();
    if (teamId == null  teamId <= 0) {
        throw new BusinessException(ErrorCode.PARAMS_ERROR);
    }
    Team team = this.getById(teamId);
    if (team == null) {
        throw new BusinessException(ErrorCode.NULL_ERROR, "队伍不存在");
    }
    long userId = loginUser.getId();
    UserTeam queryUserTeam = new UserTeam();
    queryUserTeam.setTeamId(teamId);
    queryUserTeam.setUserId(userId);
    QueryWrapper<UserTeam> queryWrapper = new QueryWrapper<>(queryUserTeam);
    long count = userTeamService.count(queryWrapper);
    if (count == 0) {
        throw new BusinessException(ErrorCode.PARAMS_ERROR, "未加入队伍");
    }
    long teamHasJoinNum = this.countTeamUserByTeamId(teamId);
    //队伍只剩下一个人,解散
    if (teamHasJoinNum == 1) {
        //删除队伍
        this.removeById(teamId);
    } else {
        //队伍至少还剩下两人
        //是队长
        if (team.getUserId() == userId) {
            //把队伍转移给最早加入的用户
            //1.查询已加入队伍的所有用户和加入时间
            QueryWrapper<UserTeam> userTeamQueryWrapper = new QueryWrapper<>();
            userTeamQueryWrapper.eq("teamId", teamId);
            userTeamQueryWrapper.last("order by id asc limit 2");
            List<UserTeam> userTeamList = userTeamService.list(userTeamQueryWrapper);
            if (CollectionUtils.isEmpty(userTeamList)  userTeamList.size() <= 1) {
                throw new BusinessException(ErrorCode.SYSTEM_ERROR);
            }
            UserTeam nextUserTeam = userTeamList.get(1);
            Long nextTeamLeaderId = nextUserTeam.getUserId();
            //更新当前队伍的队长
            Team updateTeam = new Team();
            updateTeam.setId(teamId);
            updateTeam.setUserId(nextTeamLeaderId);
            boolean result = this.updateById(updateTeam);
            if (!result) {
                throw new BusinessException(ErrorCode.SYSTEM_ERROR, "更新队伍队长失败");
            }
        }
    }
    //移除关系
    return userTeamService.remove(queryWrapper);
}
这里我们由于多次需要获得队伍当前人数,所以封装了countTeamUserByTeamId方法
/**
* 获取某队伍当前人数
*
* @param teamId
* @return
*/
private long countTeamUserByTeamId(long teamId) {
    QueryWrapper<UserTeam> userTeamQueryWrapper = new QueryWrapper<>();
userTeamQueryWrapper.eq("teamId", teamId);
return userTeamService.count(userTeamQueryWrapper);
}
同时在joinTeam方法里修改代码 
(5).测试(详细)
我这里是队伍18有了两个用户,其中4是创建者,55007是队员(为了方便可复制得到)  现在4退出队伍
  的确,4已经不存在队伍18之中了
  房主的确顺位给了55007
 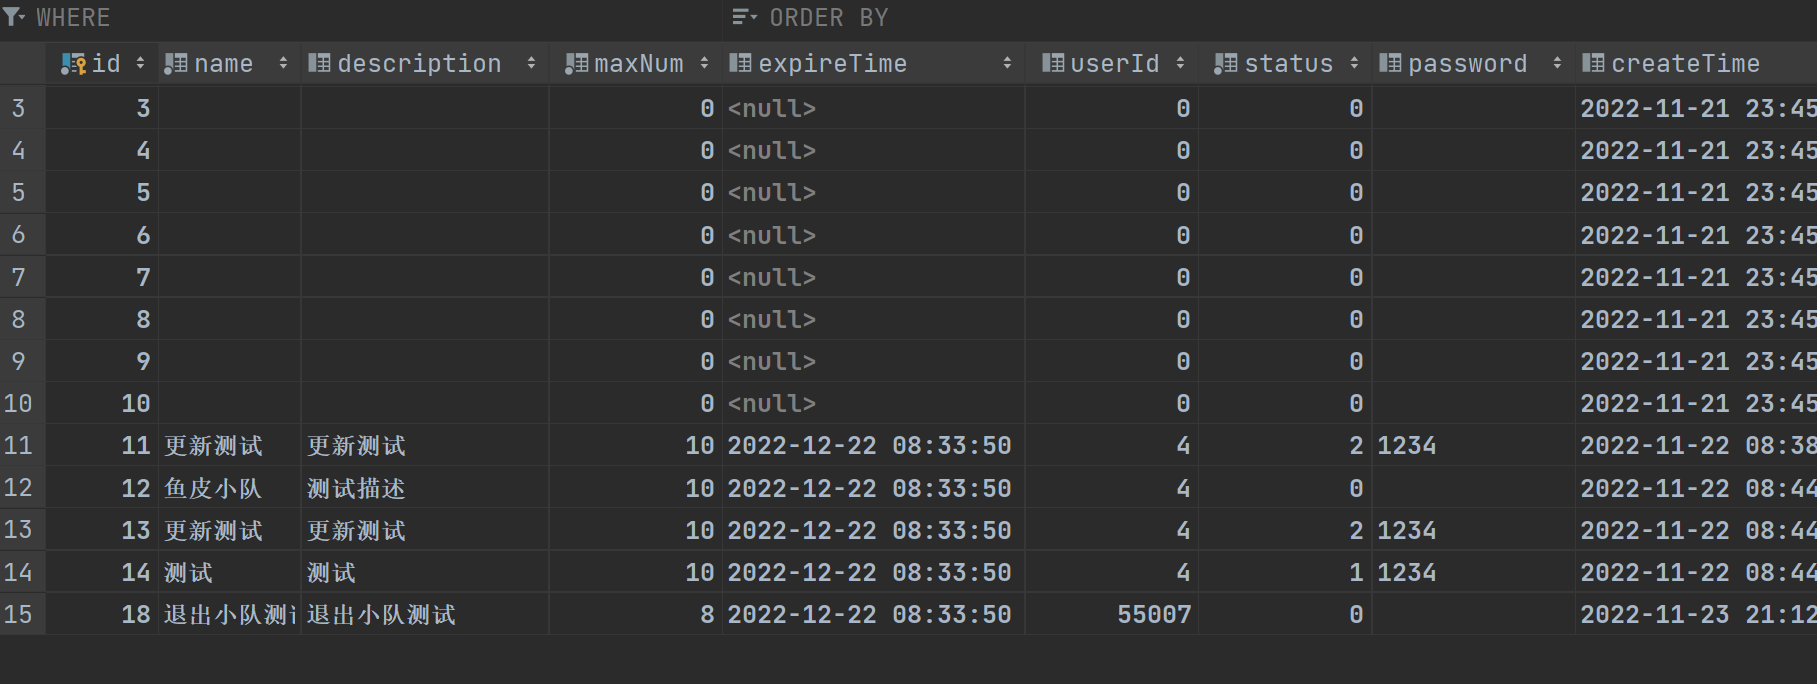 现在为了方便测试,我们直接在数据库里修改用户队伍关系表,把55007改为退出,4依旧为房主,队伍表里把房主设置为4,然后再次用4退出队伍
  队伍18被成功删除
  到此为止退出功能基本实现
2.在TeamService里编写删除队伍方法并在TeamServiceImpl里实现
(1).修改delete接口
@PostMapping("/delete")
    public BaseResponse<Boolean> deleteTeam(@RequestBody long id,HttpServletRequest request) {
    if (id <= 0) {
    throw new BusinessException(ErrorCode.PARAMS_ERROR);
}
User loginUser = userService.getLoginUser(request);
boolean result = teamService.deleteTeam(id,loginUser);
if (!result) {
    throw new BusinessException(ErrorCode.SYSTEM_ERROR, "删除失败");
}
return ResultUtils.success(true);
}
(2).在TeamService里面写入deleteTeam方法
/**
* 删除队伍
* @param id
* @param loginUser
* @return
*/
boolean deleteTeam(long id, User loginUser);
(3).在TeamServiceImpl里实现deleteTeam方法
跟上面一样,我们需要根据id获取队伍信息,这个代码我们重复的写,所以提取出来
/**
* 根据 id 获取队伍信息
*
* @param teamId
* @return
*/
private Team getTeamById(Long teamId) {
    if (teamId == null  teamId <= 0) {
    throw new BusinessException(ErrorCode.PARAMS_ERROR);
}
Team team = this.getById(teamId);
if (team == null) {
    throw new BusinessException(ErrorCode.NULL_ERROR, "队伍不存在");
}
return team;
}
在Error_Code里添加一个禁止操作 
@Override
    @Transactional(rollbackFor = Exception.class)
    public boolean deleteTeam(long id, User loginUser) {
    // 校验队伍是否存在
    Team team = getTeamById(id);
    long teamId = team.getId();
    // 校验你是不是队伍的队长
    //        //test
    //        System.out.println("team.getUserId():"+team.getUserId().getClass().getName());
    //        System.out.println("loginUser.getId():"+loginUser.getId().getClass().getName());
    if (!team.getUserId().equals(loginUser.getId())){
        throw new BusinessException(ErrorCode.NO_AUTH,"无访问权限");
    }
    // 移除所有加入队伍的关联信息
    QueryWrapper<UserTeam> userTeamQueryWrapper = new QueryWrapper<>();
    userTeamQueryWrapper.eq("teamId", teamId);
    boolean result = userTeamService.remove(userTeamQueryWrapper);
    if (!result){
        throw new BusinessException(ErrorCode.SYSTEM_ERROR,"删除队伍关联信息失败");
    }
    // 删除队伍
    return this.removeById(teamId);
}
注意在操作多个数据库时,在方法上要加上@Transactional(rollbackFor = Exception.class)注解,表示要么数据操作都成功,要么都失败。 踩坑处:这里踩了大坑在校验是不是队长时,按照鱼皮的写了,运行发现报错无权限,debug发现两者的id也是一样的,最后在球友的帮助下,发现是类型的问题,打印出两者的类型是Long封装类,判断两者需要使用equals,而不是==(好像是不支持==),我这里修改为equals成功实现,建议大家先按鱼皮的写,如果报错,就可以替换下!
(4).测试
我这里重新创建了20队伍用来测试删除队伍,然后在knife4j里直接删除队伍20  查看数据库
查看数据库 
 成功删除,删除队伍功能基本完成
二、前端设计
1.新建一个TeamAddPage,并在路由里添加这个页面
 在TeamPage里写一个按钮跳转到TeamAddPage
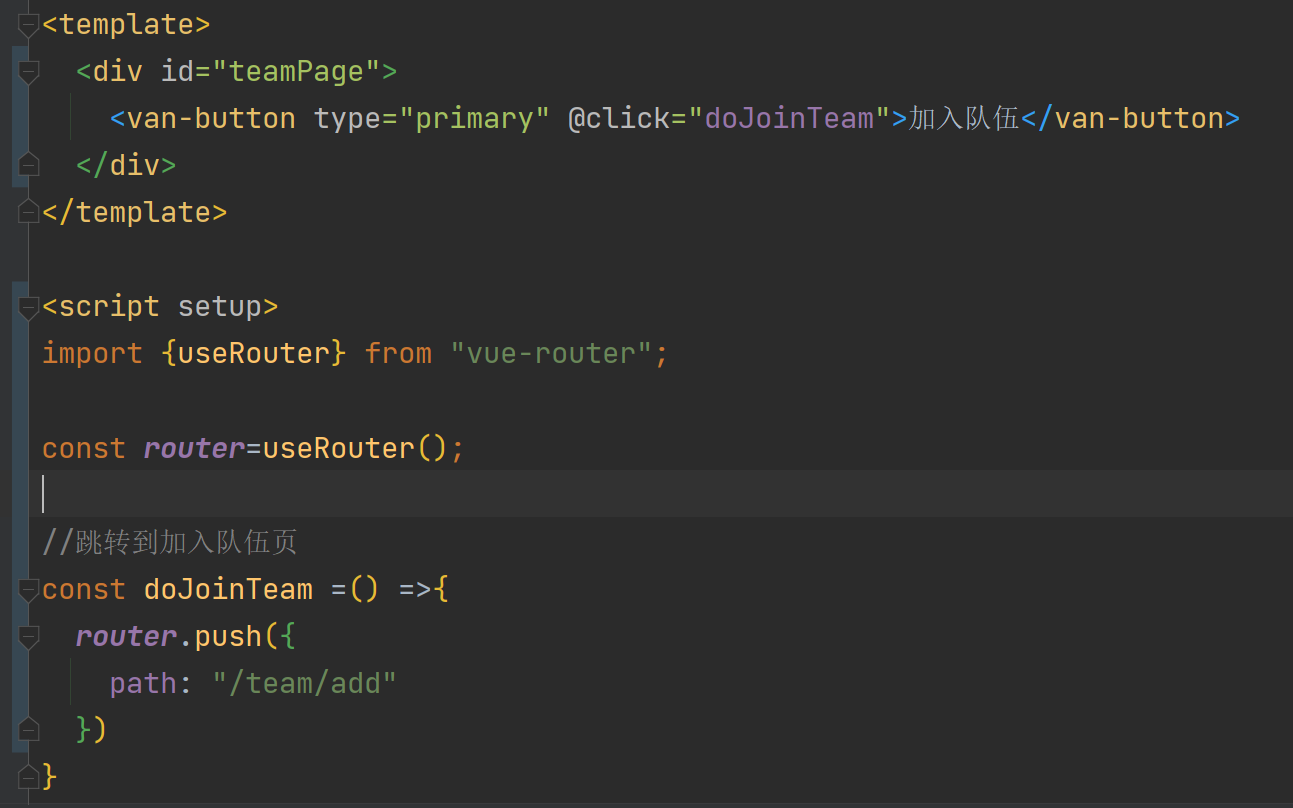
2.现在正式设计TeamAddPage页面,主要是在vant组件库里选择合适的组件粘贴
(1).队伍名和描述名
我们可以发现队伍名和描述名类似于用户登录页面的表单组件,所以拿来即用(修改下参数) 这个主要是运用了表单,单元格,输入框这三个组件,其中描述使用了高度自适应  参数我们可以从后台获得(knife4j接口文档)
(2).过期时间
我们选择vant里的DatetimePicker选择完整时间  这里的min-date 我们不能直接new Date(),因为这会导致页面一直渲染,从而页面加载不出来,我能得在建一个常量min-date,同时这个日期默认不显示,我们要在JS里展示日期选择器
(3).最大人数
这里我们选择Stepper不进器里的限制输入范围 
(4).队伍状态(当只有选择加密队伍时,才会跳出密码框)
这里我们选择表单类型里的单选框,和field输入框。 注意一定要在判断状态时,把类型转为Number,因为通过打印可得,状态是字符串类型的。 
(5).提交按钮
 native-type=”submit”属性, 点击自动获取van-field name中的值组成的对象。 关键是提交所传的的状态也要转换成Number,同时创建成功后跳转到队伍页面
  AddTeamPage页面完整代码如下:
<template>
  <div id="teamAddPage">
    <van-form @submit="onSubmit">
      <van-cell-group inset>
        <van-field
            v-model="addTeamData.name"
            name="name"
            label="队伍名"
            placeholder="请输入队伍名"
            :rules="[{ required: true, message: '请输入队伍名' }]"
        />
        <van-field
            v-model="addTeamData.description"
            rows="4"
            autosize
            label="队伍描述"
            type="textarea"
            placeholder="请输入队伍描述"
        />
        <van-field
            is-link
            readonly
            name="datetimePicker"
            label="过期时间"
            :placeholder="addTeamData.expireTime ?? '点击选择过期时间'"
            @click="showPicker = true"
        />
        <van-popup v-model:show="showPicker" position="bottom">
          <van-datetime-picker
              v-model="addTeamData.expireTime"
              @confirm="showPicker = false"
              type="datetime"
              title="请选择过期时间"
              :min-date="minDate"
          />
        </van-popup>
        <van-field name="stepper" label="最大人数">
          <template #input>
            <van-stepper v-model="addTeamData.maxNum" max="10" min="3"/>
          </template>
        </van-field>
        <van-field name="radio" label="队伍状态">
          <template #input>
            <van-radio-group v-model="addTeamData.status" direction="horizontal">
              <van-radio name="0">公开</van-radio>
              <van-radio name="1">私有</van-radio>
              <van-radio name="2">加密</van-radio>
            </van-radio-group>
          </template>
        </van-field>
        <van-field
            v-if="Number(addTeamData.status) === 2"
            v-model="addTeamData.password"
            type="password"
            name="password"
            label="密码"
            placeholder="请输入队伍密码"
            :rules="[{ required: true, message: '请填写密码' }]"
        />
      </van-cell-group>
      <div style="margin: 16px;">
        <van-button round block type="primary" native-type="submit">
          提交
        </van-button>
      </div>
    </van-form>
  </div>
</template>

<script setup lang="ts">

import {useRouter} from "vue-router";
import {ref} from "vue";
import myAxios from "../plugins/myAxios";
import {Toast} from "vant";

const router = useRouter();
// 展示日期选择器
const showPicker = ref(false);

const minDate = new Date();

const initFormData = {
  "name": "",
  "description": "",
  "expireTime": null,
  "maxNum": 3,
  "password": "",
  "status": 0,
}

// 需要用户填写的表单数据
const addTeamData = ref({...initFormData})

// 提交
const onSubmit = async () => {
  const postData = {
    ...addTeamData.value,
    status: Number(addTeamData.value.status)
  }
  // todo 前端参数校验
  const res = await myAxios.post("/team/add", postData);
  if (res?.code === 0 && res.data){
    Toast.success('添加成功');
    router.push({
      path: '/team',
      replace: true,
    });
  } else {
    Toast.success('添加失败');
  }
}
</script>

<style scoped>
#teamPage {

}
</style>
(6).启动前后端项目,测试
前端页面显示如下  输入数据,提交。我这边已经添加队伍了(忘记截图了),如果正确的话,成功跳转 数据库成功加入数据
3.设计队伍列表
1.我们首先要定义队伍类型(team.d.ts)
import {UserType} from "./user";

/**
 * 队伍类别
 */
export type TeamType = {
    id: number;
    name: string;
    description: string;
    expireTime?: Date;//表示可有可无
    maxNum: number;
    password?: string,
    // todo 定义枚举值类型,更规范
    status: number;
    createTime: Date;
    updateTime: Date;
    createUser?: UserType;
    hasJoinNum?: number;
}
2.创建一个队伍卡片列表组件(类似于用户卡片列表)
(1).复制用户卡片列表,将userlist改为teamlist,UserCardList改为TeamCardList,UserType改为TeamType
<template>
  <van-card
      v-for="user in props.teamList"
      :desc="user.profile"
      :title="`${user.username} (${user.planetCode})`"
      :thumb="user.avatarUrl"
  >
    <template #tags>
      <van-tag plain type="danger" v-for="tag in user.tags" style="margin-right: 8px; margin-top: 8px" >
        {{ tag }}
      </van-tag>
    </template>
    <template #footer>
      <van-button size="mini">联系我</van-button>
    </template>
  </van-card>
</template>

<script setup lang="ts">

import {TeamType} from "../models/team";

interface TeamCardListProps{
  teamList: TeamType[];
}

const props= withDefaults(defineProps<TeamCardListProps>(),{
  //@ts-ignore
  teamList: [] as TeamType[]
});

</script>

<style scoped>

</style>
(2).然后我们将此组件挂载在TeamPage页面
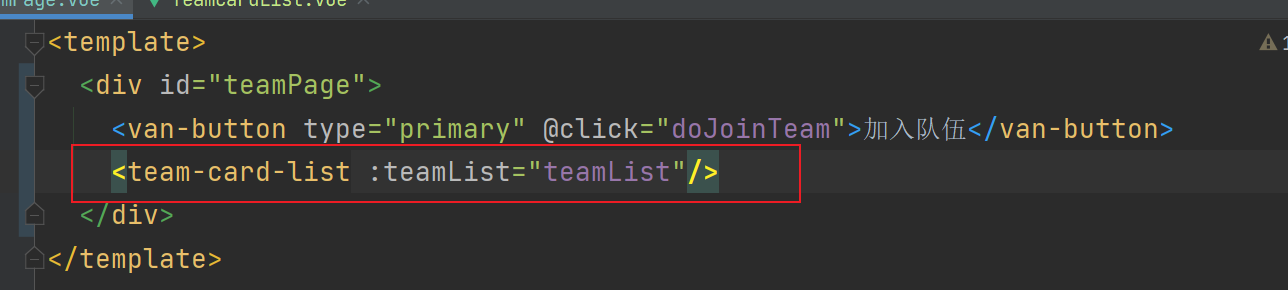
 注意:引入team-card-list时,编译器可能不会帮你把引入的类型自动带上,需自己添加
  将team-card-list里的原来的用户参数换成队伍的,测试一下
  刷新页面,成功加载出组件(就是很丑,展示不齐全)
(3).现在我们要完善teamcardlist组件
添加队伍状态,最大人数等以及实现加入队伍功能 我们下方要涉及到队伍的状态,我们先创建队伍状态常量 team.ts  完整代码如下:
<template>
  <div>
    <van-card
        v-for="team in props.teamList"
        :thumb="mouse"
        :desc="team.description"
        :title="`${team.name}`"
    >
      <template #tags>
        <van-tag plain type="danger" style="margin-right: 8px; margin-top: 8px">
          {{
            teamStatusEnum[team.status]
          }}
        </van-tag>
      </template>
      <template #bottom>
        <div>
          {{ '最大人数: ' + team.maxNum }}
        </div>
        <div v-if="team.expireTime">
          {{ '过期时间: ' + team.expireTime }}
        </div>
        <div>
          {{ '创建时间: ' + team.createTime }}
        </div>
      </template>
      <template #footer>
        <van-button size="small" type="primary"  plain @click="doJoinTeam(team.id)">加入队伍</van-button>
      </template>
    </van-card>
  </div>

</template>

<script setup lang="ts">
import {TeamType} from "../models/team";
import {teamStatusEnum} from "../constants/team";
import mouse from '../assets/mouse.jpg';
import myAxios from "../plugins/myAxios";
import {Toast} from "vant";

import {useRouter} from "vue-router";

interface TeamCardListProps {
  teamList: TeamType[];
}

const props = withDefaults(defineProps<TeamCardListProps>(), {
  // @ts-ignore
  teamList: [] as TeamType[],
});

const router = useRouter();

/**
 * 加入队伍
 */
const doJoinTeam = async (id:number) => {
  const res = await myAxios.post('/team/join', {
    teamId: id,
  });
  if (res?.code === 0) {
    Toast.success('加入成功');
  } else {
    Toast.fail('加入失败' + (res.description ? `,${res.description}` : ''));
  }
}

</script>

<style scoped>
#teamCardList :deep(.van-image__img) {
  height: 128px;
  object-fit: unset;
}
</style>
注意:1.这里thumb我们引入了图片(显示更美观),可以把自己心仪的图片放入assets里并引入
2. 加入队伍里面失败,写的形式是模板字符串,可自行了解
   式,原来的图片过于宽,要指定高度关闭自适应,这里我们使用样式穿透,不然不起作用,**如果我们给部分组件引入的样式不起作用,都可以使用样式穿透!**
(4).测试
刷新页面,页面显示如下,点击加入队伍,成功显示插入失败,已加入队伍(这里我是房主,所以加入失败,也可以登入其他用户测试)